Transferring money from a digital wallet to your bank account using UPI (Unified Payments Interface) has become one of the most convenient and efficient ways to manage your finances. Whether you’re looking to transfer funds from Paytm, Google Pay, PhonePe, or any other mobile wallet, UPI allows for seamless transfers with just a few taps. In this guide, we’ll walk you through everything you need to know about how to transfer money from your wallet to your bank account via UPI.
By the end of this article, you’ll understand the entire process, including the steps involved, fees, and the best practices for ensuring a smooth and secure transfer.
Table of Contents
What is UPI and Why Is It Important for Wallet Transfers?
Unified Payments Interface (UPI) is a revolutionary digital payment system developed by the National Payments Corporation of India (NPCI). UPI enables instant money transfers between bank accounts, without requiring any intermediate processes. It connects various banks and payment apps through a single platform, simplifying the entire payment process.
The importance of UPI for wallet-to-bank transfers lies in its ability to provide:
-
Instant Transfers: UPI facilitates near-instantaneous money transfers, making it faster than traditional banking methods.
-
Ease of Use: UPI is designed to be simple to use, with minimal steps required to make transfers.
-
Security: UPI offers high levels of security with encryption and the use of secure authentication methods like your UPI PIN.
-
Wide Acceptance: UPI is accepted by all major banks and most mobile wallet apps.
So, when you want to transfer wallet funds to UPI-enabled accounts, UPI becomes your go-to method for seamless, fast, and secure transactions.
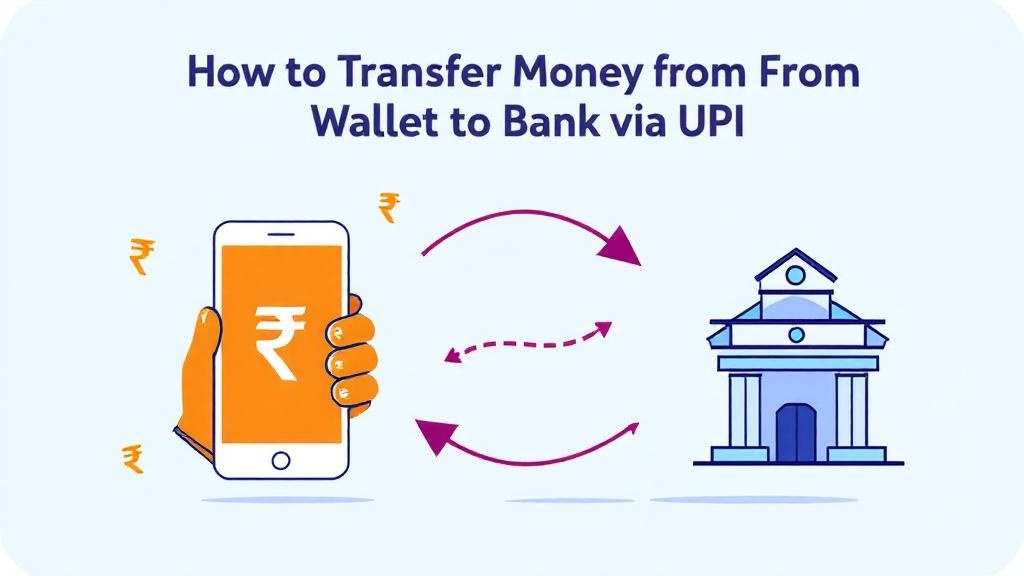
Step-by-Step Guide: How to Transfer Wallet to Bank via UPI
Now, let’s walk through the process of transferring money from your digital wallet to your bank account using UPI.
1. Link Your UPI-enabled Bank Account to Your Wallet
Before making any transfer, ensure that your UPI-linked bank account is connected to your digital wallet. This is an essential step because the funds will be moved directly from your wallet to the bank account via UPI.
-
How to Link UPI with Wallet:
-
Open your wallet app (e.g., Paytm, Google Pay).
-
Go to the “UPI” section in the settings.
-
Choose the option to link a bank account.
-
Select your bank and enter the necessary details.
-
Set or verify your UPI PIN.
-
Once linked, you can start transferring money directly from your wallet to your UPI-enabled bank account.
2. Select ‘Transfer to Bank’ Option
Each wallet app has an option to transfer funds to a bank account. Depending on the wallet you use, you might see a “Bank Transfer” or “UPI Transfer” option.
-
Open your wallet app and select “Passbook” or “Balance” to view your wallet balance.
-
Choose the option to transfer funds and select your linked UPI bank account.
-
Enter the amount you wish to transfer.
3. Confirm Transfer Details
Before proceeding with the transfer, double-check the details:
-
Amount to be Transferred: Ensure you’ve selected the correct amount.
-
UPI Bank Account Details: Confirm that the correct UPI-enabled bank account is selected.
Once verified, proceed with the transaction.
4. Enter UPI PIN and Confirm
After verifying the transfer details, you’ll be prompted to enter your UPI PIN to authenticate the transaction. This step adds an extra layer of security to the transfer process.
-
Enter your UPI PIN and click Confirm.
-
Your transaction will be processed instantly, and you’ll receive a confirmation notification once the transfer is complete.
Types of Wallet to Bank UPI Transfers
There are several methods you can use to transfer money from a wallet to a bank account via UPI. Let’s take a look at some popular options.
Transfer from Paytm to UPI Bank
One of the most common mobile wallets used in India is Paytm, which integrates seamlessly with UPI for bank transfers. Here’s how you can transfer funds from Paytm to a UPI-enabled bank account:
-
Open Paytm and navigate to the “Passbook” section.
-
Choose “Transfer to Bank” and select your UPI-enabled bank account.
-
Enter the amount to transfer and confirm.
-
Enter your UPI PIN to complete the transaction.
Paytm supports UPI bank transfers instantly, allowing you to move money from your wallet to your bank with just a few steps.
UPI Wallet Transfer Apps
In addition to Paytm, several other apps support wallet-to-UPI transfers, including Google Pay, PhonePe, and others. These apps follow a similar process:
-
Google Pay: Choose the “Bank Transfer” option under the “Pay” section and follow the prompts to transfer funds to your linked UPI bank account.
-
PhonePe: Select “Passbook,” then choose “Transfer to Bank” and link your bank account via UPI to start the transfer.
Fees Involved in Wallet to Bank UPI Transfers
The good news is that transferring money from a wallet to a UPI-enabled bank account is usually free or incurs minimal fees. However, some apps might charge a small fee under specific conditions, such as:
-
Wallet to Bank Transfer UPI Fees: Some apps might charge a fee when transferring amounts beyond a certain limit or for urgent transfers.
-
Transaction Limits: Wallet apps typically have daily transaction limits for transferring funds to a bank account via UPI. These limits can vary depending on the wallet provider.
Always check the fees and limits before initiating the transfer to avoid any surprises.
Secure Wallet to Bank Transfers via UPI
Ensuring the security of your transactions is paramount when transferring money from your wallet to your bank account via UPI. Here are some tips to ensure your wallet transfers are safe:
1. Enable Two-Factor Authentication (2FA)
Always enable two-factor authentication (2FA) for your wallet app. This will require you to authenticate with both your password and an OTP (one-time password), making the transaction more secure.
2. Use Strong UPI PINs
Make sure that your UPI PIN is strong and unique. Avoid using easily guessable PINs like 1234 or your birth year.
3. Check for Fraudulent Apps
Ensure that the wallet app you are using is officially supported by your bank or the UPI network. Avoid downloading untrusted apps or clicking on suspicious links that claim to offer wallet transfers.
Common Problems and How to Troubleshoot
Here are some common issues users face when transferring money from a wallet to a UPI-enabled bank account and how to fix them:
1. Transfer Failed:
-
Solution: Ensure you have a stable internet connection and that your UPI PIN is correctly entered.
2. Incorrect UPI Details:
-
Solution: Double-check the bank account linked to your wallet to ensure it’s UPI-enabled.
3. Transaction Limit Exceeded:
-
Solution: Check your wallet app for daily transaction limits. Try reducing the transfer amount or wait until the next day.
FAQs: Everything You Need to Know
1. How can I transfer money from Paytm wallet to my UPI bank account?
You can easily transfer funds by selecting “Transfer to Bank” in Paytm, linking your UPI-enabled bank account, entering the amount, and confirming with your UPI PIN.
2. Are there any fees for transferring money from wallet to bank via UPI?
Most wallet-to-bank transfers via UPI are free, but some apps may charge fees for higher amounts or urgent transactions.
3. Is wallet-to-UPI bank transfer instant?
Yes, transfers are usually instant, but there may be a delay in rare cases due to network issues or app-specific restrictions.
4. Can I transfer funds from my mobile wallet to any bank account?
Yes, as long as the bank account is UPI-enabled, you can transfer funds from your wallet to that account.
5. Is my wallet-to-UPI transfer safe?
Yes, as long as you use trusted apps and enable security features like 2FA and a strong UPI PIN.
Conclusion
Transferring money from your wallet to a UPI-enabled bank account is quick, secure, and efficient. By following the simple steps outlined in this guide, you can seamlessly manage your digital wallet and bank accounts. Always ensure that you’re using a trusted app and take the necessary security precautions to protect your transactions.
With UPI, the future of digital payments is here—allowing you


Comments (0)